I. Introduction
Installing a drain is not a simple process, it is a well-organized process that involves positioning and sealing to avoid any complications such as leaking and bad drainage systems. This article will help you how to install a stainless steel square shower drain step-by-step.
II. Tools & Materials Needed for Installation
Before you begin, gather the necessary tools and materials to make the process smoother.
1. Tools
- Tape measure
- Level
- Plumber’s putty or silicone sealant
- Pipe wrench
- Screwdriver
- Trowel
- Utility knife
- Bucket
- Gloves
2. Materials
- Stainless steel square shower drain (ensure the correct size)
- Drain pipe (PVC or metal, depending on your plumbing system)
- Waterproof membrane
- Mortar mix or thin-set mortar
- Tile adhesive and grout
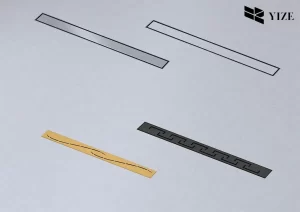
III. Step 1: Selecting the Right Stainless Steel Square Shower Drain Size.
To ensure that the curtains, blinds or shades fit excellently, you should consider the comment size of stainless steel square shower drain:
- There are Standard Sizes available for showers and it is recommended that the drain should not be too small or too large for the size of the shower floor.
- Size of the Pipe – typically, shower drains come with 2-inch pipe diameter; ensure that this is correct before making the purchase.
- Take into consideration the water flow rate- in case your shower has a high pressure showering system, it is advisable to install a drain that has a large capacity.
- Variety – There is option of choosing between a normal grate or a tile-insert kind for a better look of tiles.
A stainless steel square shower drain of appropriate size will help avoid formation of pools of water on the bathroom floor. If you are looking for a reliable square shower supplier, major retailers which offer a variety of stainless steel options.
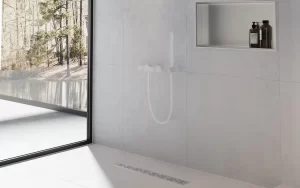
IV. Step 2: Prepare the Shower Floor
Some of the chief considerations that make a roofing installation a leak-free process are;
- Shut Off Water Although you may not intend on handling the pipes directly it is wise to turn off the water to avoid any dangerous mishaps.
- Prepare the Installation Area – Before installing a floor or wall tile it is necessary to clean the area by washing off dust, old grout, or anything else that may hinder the sealing process.
- Make the proper slope – the shower floor should have a slope of about ¼ of an inch per every one foot of floor length in order to avoid water accumulation.
Pro Tip for direct approach: Before installing the new shower drain, it is advisable to remove the old drain since it will help you avoid damaging the plumbing when fixing the new drain.
V. Step 3: Install the Drain Base
Position the Drain Flange – Enumerate the position on the shower floor on which the drain flange of the base will be fixed.
- Use plumber’s putty or sealant – You should rub a thin layer around the flange to increase its compatibility.
- Connect the Drain to the Pipe – When screwing the drain coupling on the pipe you must use a wrench to tightened it.
- Level & Alignment – The drain should lay flat on the floor and it should be placed in the right position before proceeding.
VI. Step 4: Apply Waterproofing Membrane

It is an important aspect to make sure that water seepage is curbed and mold preventable from growing.
- Cut the Waterproof Membrane – You should trim this right to the edge of the drain opening so that it can fit tightly.
- Seal the Edges – Apply a waterproof glue to join the membrane to the ground.
- Issue area: Absence of wrinkles and gaps on fabrics and garments The tests that need to be performed on the fabric with the most important requirements are the following:
Stat Fact: In line with this, research findings reveal that more than 90% of showers have leakage problems associated with fitting and sealing of drains.
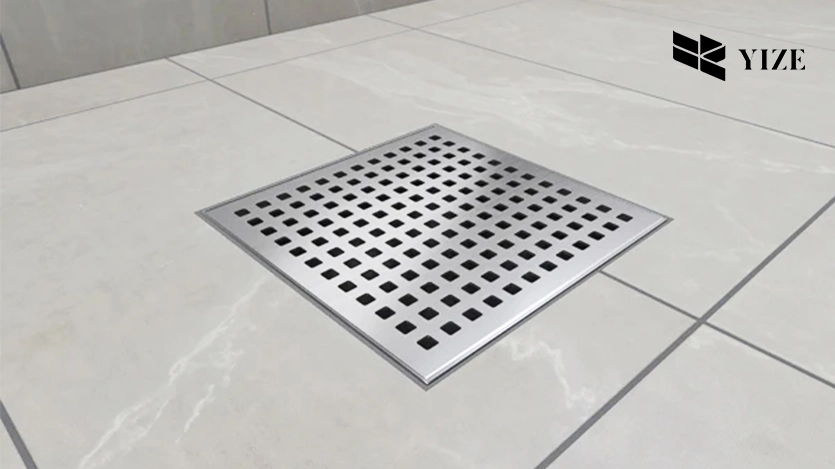
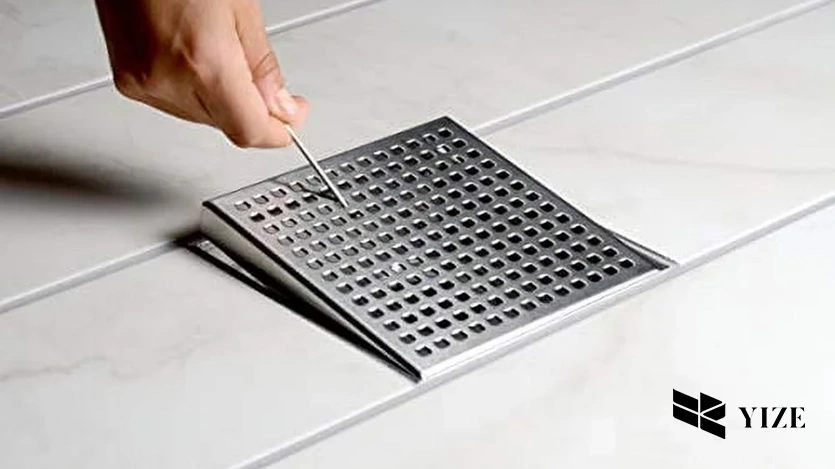
VII. Step 5: Secure the Drain Cover & Surrounding Area
After the base is prepared, you can now proceed to put in the square stainless steel shower drain cover.
- Secure the Square Stainless Steel Shower Drain Cover: Tie the cover to the opening of the drain using the screws if there are any available.
- Check for Stability: The cover should not raise above the surface of the tiles at all, or at worst, should be only slightly raised.
- Bring Mortar Around the Drain: You should apply thin-set mortar at the point where the drain intersects with the tiles.
Stat Fact: When it comes to the longevity of the drains, the stainless steel ones are known to last 5 times longer than plastic ones because of the corrosion.
VIII. Step 6: Install Tiles Around the Drain
Follow these steps to lay the tiles perfectly:
- Prime Coat: To apply a thin coat, it is advisable to use a trowel.
- Lay the Tiles: Most of the tiles should be cut to fit around the drain then pressed on the_slabs_.
- Grout the Gaps: Fill spaces between the tiles with waterproof grout.
- Remove Excess Grout: This has to be done when the grout is slightly wet before it dries completely.
Whenever a tile-insert drain cover is employed, the tile used should be like the rest of the tiles that compose the shower floor.
IX. Step 7: Final Checks & Testing
Cross verify to make sure everything is perfect:
- Do Not Use: Let everything dry – After the usage of the mixture it is advisable to wait for at least 24 hours before testing the drain.
- Water Flow: This helps the examiner know if water will freely flow through specific area without stagnation.
- Check for Leaks: Anyone using a shower should keenly inspect for any signs of water leaks around the shower area especially on the walls and on the floor.
If all has gone as planned, the installed stainless steel square shower drain should be ready for use at this stage.
X. Conclusion
Following the above guidelines, you will get a high-quality drain. That amongst being good-looking should serve you can do it several years. This is very important people to understand that the type of drain installed significantly determines the cleanliness of the shower.
Frequently Asked Questions (FAQs)
Q1: What is the best size for a stainless steel square shower drain?
Standard drains are normally 4 x 4 inches and for the larger showers, there are larger drains provide of 6 x 6 inches and above.
Q2: Can I install a stainless steel square shower drain myself?
Yes, DIY installation is very much possible providing one has the right equipment and the will to perform the installation all by him/herself. Although, it may be more complicated to do the plumbing by yourself especially during installation it is advisable that one hires the services of a professional plumber.
Q3: How often should I clean my shower drain?
Indeed, to avoid such blocks in the drainages, you should use a snake or simple cleaning agents to clean out your drain at least once in a month.
Q4: Where can I buy a high-quality stainless steel square shower drain?
There are several sources of obtaining reliable options; these including a square shower supplier or some stores like Home Depot or Lowe’s