Fitting a linear shower drain can sound like a big deal since it’s a must-have for directing water into the drain system under your concrete floor. But, with some solid advice, you can handle it if you’ve got a little plumbing know-how. Of course, if DIY isn’t your thing, it’s okay to call in a pro.
Picking the right shower drain for your concrete base matters a lot. There are all kinds of pipes and sealants to consider. So, the real question is: how do you install linear shower drains on concrete floors?
To install a linear shower drain in concrete: Plan for a 2-inch pipe, 1-1/4 inches below the surface. Cut the drain space, ensuring a 1-inch gap at the ends. Drill to fit the drain, then seal with concrete and waterproof membrane. Test for flow and leaks before the final finish.
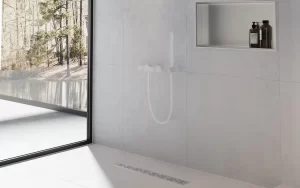
The best part about getting one of these linear shower drains in place? You’re basically telling mold and mildew to take a hike. Those guys love to hang out where it’s wet, and showers are like a vacation spot for them. But a linear drain that’s put in right and sealed up tight keeps your shower not just working smoothly but also looking clean, staying healthy, and feeling like a breath of fresh air.
So, let’s get down to it. This guide is going to show you, step-by-step, how to nail this installation. We’ll tell you all about the tools and materials you’ll need to kick things off. Plus, we’ll throw in some insider tips to make sure your shower doesn’t just work great — it looks great, too.
Installing a Linear Shower Drain on a Concrete Floor
Updating your shower with a stylish linear drain takes careful work and the right equipment. Before you start, check that your concrete is solid, secure, and clean. It should also meet the Tile Council of North America (TCNA) standards for minimal substrate deflection. Make sure the base is firm and doesn’t bend or give way too much.
Essential Tools and Materials You will need:
- Drill/driver with a #2 Philips bit
- Saw (Tile, Circular, or Chop)
- Reciprocating or Oscillating Saw
- Measuring Tape, Marker, and Level
- ABS or Transition Cement
- Modified Thinset, Trowel, Mixer, and Sponge
- Cleaning Supplies (Citrus wipes, rags, etc.)
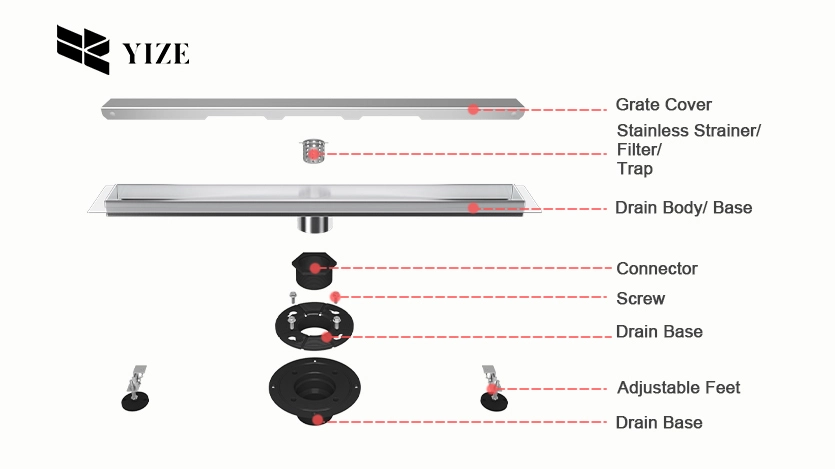
Installation Components:
- Linear Drain Kit Components (Ensure all parts are included)
- Additional backing and trim parts (if needed)
Step-by-Step Installation
Here’s how to get that chic look for your shower, even with a concrete subfloor.
Step 1: Planning Your Drain Placement
First things first, you’ll need to figure out where your drain pipe will go. It’s like putting a puzzle together – you want to make sure all the pieces fit perfectly. Usually, a section of the floor – about the size of a small notebook (4”x6”) – needs to be taken out. This is where the pipe will be tucked in.
And here’s a tip: get a professional plumber to install a 2-inch pipe in this spot. It’s crucial that this pipe is a little lower (1-1/4 inches, to be exact) than the surface where the drain will rest. This is where the linear shower drain end outlet will eventually connect.
This is critical to ensure optimal water flow and prevent standing water. Remember, the goal is a seamless, efficient concrete drain system.
Step 2: Preparing Your Drain
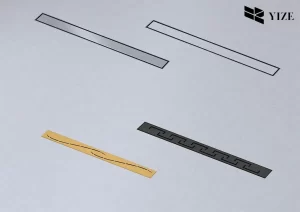
Now, grab your Yize Linear Drain and measure it to fit your space; possibly, a 60 linear shower drain will go. You can cut it to size with tools like a tile saw if you need to, but remember to leave a small gap (about 1 inch) at each end for a snug fit.
To get the perfect size, place the drain where it will go and use the end caps (they’re like bookends for your drain) as guides. Draw a line where you need to cut, making sure it’s straight and even.
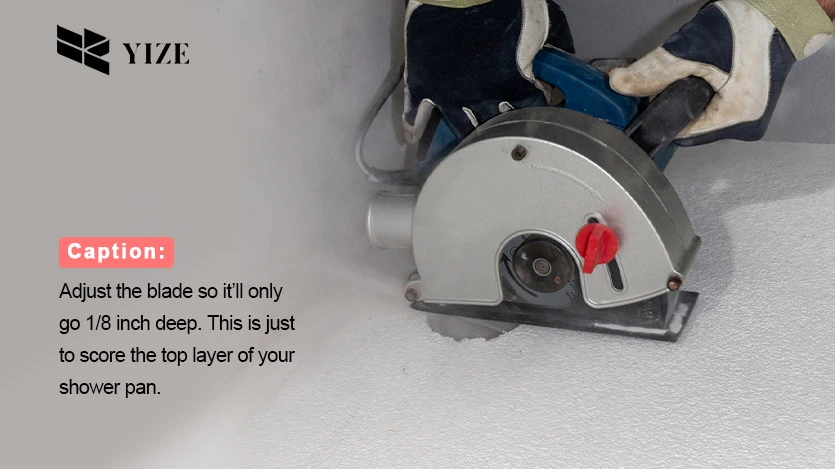
Now, cut a little channel on the concrete surface. Use your saw (or a utility knife for more control) along with a straight edge to guide you. You want to make a groove that’s half an inch deep and one inch up from the bottom.
Next. Take a utility knife and deepen the cut from the top score down to the side groove. This creates a ‘notch’ in the slope of your shower pan, where your drain will fit nicely.
Once cut, you’ll put the end caps on the drain. They need to be aligned just right, so follow the markings. If something doesn’t fit, trim it a bit more.
Step 3: Drilling the Hole
Once you’ve marked the location, it’s time to drill. Use a hammer drill and masonry bit for precision. The hole must match the size of your linear concrete drain. Accuracy is key. Drill carefully to avoid a hole that’s too large or small.
https://www.youtube.com/watch?v=7YQsuLdEQVE
Step 4: Installing the Drain
Now, insert your linear shower drain into the hole. Make sure it sits level with the concrete. If necessary, add a layer of gravel for proper drainage. It’s vital that the base is compact and level to prevent any future shifting.
There should be no gaps between the drain and the concrete. Check twice to ensure it’s secure.
Attach the linear shower drain to your home’s concrete drain system. This might require PVC piping or other materials, depending on your specific system.
Step 5: Sealing the Connection
Fill any spaces around the drain with concrete. This secures the drain and directs water toward it. A well-leveled floor is crucial for proper drainage. Use a reliable sealant for a watertight bond.
Fitting Your Drain Access Cover! Your drain cover comes in two parts: the Access Trim (the frame) and the Access Tray (the part that holds the tile). Stick the Access Trim permanently to the Drain body using the fast-set glue or sealant provided. Leave the Access Tray unglued so you can take it out if you need to fix anything later.
Gap Sticks are little sticks you’ll put in the drain slot to make sure your tiles don’t cover it while you’re laying them down. They keep the space just right and stop any mess from getting in the way. Coat them with the ebbe wax given, cut them to length, and place them in the slot. Important: Don’t put grout between the Access Trim and Access Tray; they need to move separately.
Pro Tip: Use ABS pipe cement (it’s a special glue) to stick the ramps (they make your shower floor slope toward the drain) and end caps onto the drain. Add some screws to hold everything in place and wipe away any extra glue.
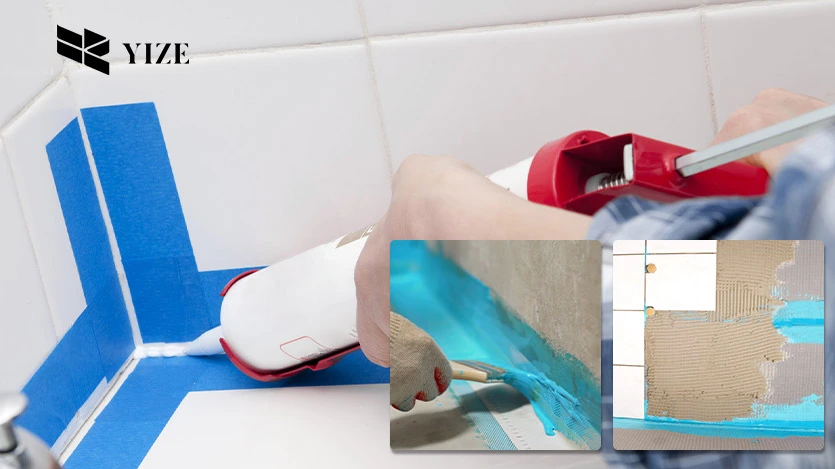
Step 6: Waterproofing is Essential
Apply a waterproof membrane over the installation area. Flip your drain over and put on another layer of glue along the edges for a watertight seal. Let it sit for a minute before moving on. This step is vital in creating a concrete channel drain that’s impervious to leaks. Waterproofing also protects the structure underneath from water damage.
Step 7: Testing Your Installation
Before finishing, test the drain. Run water to ensure it flows correctly and check for leaks. Address any issues immediately. Proper function is crucial for a reliable concrete drain system.
Step 8: Final Touches
After confirming everything works, clean up the installation area. Remove any debris and ensure the space is neat. Your new linear concrete drain is now ready for use.
Smart Tips for a Smooth Installation
Who installs channel drains? If you’re into DIY, you might consider doing it yourself. Make sure you’ve got all your measurements down and your tools lined up before you start. Safety first—goggles and gloves are a must.
But, to make sure everything is up to code and meets all the plumbing standards, it’s usually smarter to get a pro to do it. Also, double-check that everything you’re planning is cool with your local building rules.
If you plan well and take your time, you can definitely install a linear shower drain on your concrete floor.
A Final Note on Aesthetics and Functionality
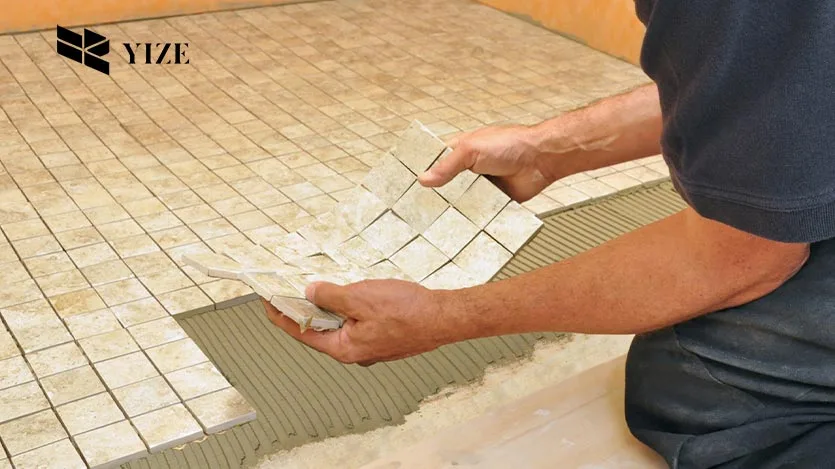
The beauty of a linear shower drain, beyond its function, is its ability to blend with your bathroom’s aesthetics. When tiling around your new drain, make sure to cut the tiles to fit snugly for a professional finish.
For instance, If you’re working with those little tiles, the ones under 2 inches, it’s super important to use a really strong grout — think 3500 PSI level strength, or go for an epoxy grout. This is key to making sure those tiles stay in place, and it also makes sure our Linear Shower Drain warranty covers you.
So, wrapping it all up, putting in a linear shower drain in a concrete-floor bathroom, is a solid move for upping your bathroom’s game. It looks sleek and works like a charm. Armed with this guide, you’re all set to get it done right. Just keep in mind: measure carefully, cut once, and don’t skimp on the waterproofing. That’s your ticket to a top-notch shower drain install.