Table of Contents
more post
Tile-In vs Grate Cover Linear Drains–Which One Fits Your Target Market?
Why More EU Importers Are Sourcing Linear Drains from China Manufacturers
How to Build a Shower Pan with a Linear Drain: A Comprehensive Guide
Modern bathroom renovations focus not just on aesthetics but also on functionality. One such functional and stylish element in contemporary bathrooms is the linear shower drain.
For homeowners looking to give their bathrooms a modern edge, building a shower pan with a linear drain is an increasingly popular choice. This guide is specifically crafted for the DIY enthusiast in the U.S. who wants to understand how to build a shower pan with a linear drain.
To build a shower pan with a linear drain, first select the right drain location and set the drain height. Protect your floor with tar paper and wire lath, then set the base drain. Create a sloping floor with mortar, ensuring a ¼-inch slope per foot. Add a waterproof barrier, lay final mortar, and then tiles. Seal the joint between the tile and drain with silicone caulk, and finish by placing the grate cover. Ensure proper slope for efficient drainage.
Building a shower pan may sound like a straightforward job, but there are multiple layers and crucial steps involved. One of the most critical yet often neglected steps is waterproofing. But don’t worry! We’re here to break it all down in a way that anyone can understand.
Let’s dive in!
Image content: Quick Facts:
- How Long does it take to build a shower pan with a linear drain?: Initial work: 1-3 days | Completion: 3-5 days
- Skill Needed: High (It’s not beginner-friendly!)
- Budget: Around $6,000
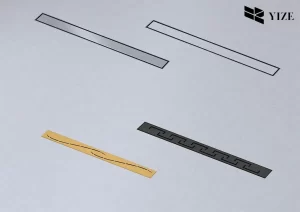
What is a Linear Shower Drain?
Unlike traditional circular drains situated at the center of your shower floor, the linear drain runs lengthwise, usually parallel to the shower entrance.
Linear drains are the epitome of modernity and simplicity. Their sleek, straight-line design makes them a perfect fit for both modern and minimalist bathrooms. Plus, they blend in smoothly, ensuring the drain doesn’t interrupt your floor’s design.
Many prefer the stainless steel shower pan because of its durability and aesthetic appeal.
Why Linear Shower Drains are a Must-Have
Linear shower drains, sometimes called channel drains, are not just about function but also about form. Let’s explore why they’re becoming the trend.
- Nobody likes spending hours cleaning bathroom drains. Luckily, linear drains are designed with ease in mind. Their simple design means fewer nooks and crannies for dirt to hide, making them super easy to keep sparkling clean.
- One of the biggest wins of linear drains? Their efficiency. They come with fast-flow waste systems, ensuring quick water drainage. That means a lower chance of clogs and standing water. Goodbye, puddles!
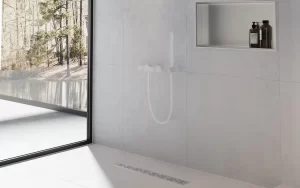
- Step-free and flat with the floor, linear drains are a fantastic choice for accessibility. They make walk-in showers truly “walk-in,” without any bumps or barriers. If you’re aiming for a bathroom that suits everyone, from kids to seniors, this is your pick.
- Want to up your home’s value? Adding a touch of modernity, like a linear shower drain, can do just that. They’re not only functional but also a sign of a well-thought-out, up-to-date home. Combining it with a walk-in shower? That’s a winning combo!
Installing a Linear Shower Drain: A Step-by-Step Guide
What You’ll Need – Equipment / Tools:
- Tape measure
- Drill and hole saw bit
- Utility knife
- Wire cutters
- Level
- Bucket
- Mixing paddle (optional)
- Shovel and trowel
- Tile wet saw or cutter
- Grout tools: float and sponge
Materials:
- Linear drain assembly
- Base drain
- Protective layers: tar paper & wire lath
- Drain glue (if needed)
- Shower pan mortar mix
- Waterproof liner
- Silicone caulk
- Pea gravel
- Thinset mortar mix
- Tile & grout
Step 1: Picking the Right Drain Location:
Measure with a tape measure and mark the desired drain spot. Remember, there are several types of linear drains based on their positioning. Choose one that suits your bathroom’s design best. The shower base with linear drain is a common choice.
Your linear drain could be:
- One-sided wall-mounted: Placed against one wall.
- Three-sided wall-mounted: Touching three walls.
- Free floor-mounted: Positioned freely on the floor.
- Shower entrance floor-mounted: Laid across the shower entrance.
Step 2: Setting the Drain Height and Making the Hole:
Make sure the drain’s top aligns with the tile level.
- Measure the drain’s height with and without the grate cover.
- Ensure the drain top is slightly (about 1/16-inch) below the tile.
- If relocating the drain, drill a neat hole (around 3 1/2-inch) through the plywood. Place the hole’s center roughly 2 1/2 to 3 inches from the back wall.
- Position the drain inside to confirm the height.
Step 3: Protect Your Floor:
Cover your floor with tar paper (to prevent moisture) and lay wire lath over it for added strength.
Step 4: Set the Base Drain:
Insert the base drain into the previously drilled hole. Pour a little water to check for leaks. If everything looks good, you might not need drain glue. If unsure, better to seal it.
Ensure you’ve appropriately handled the shower drain offset to prevent any future complications. Once the base is ready, insert your linear drain system.
Step 5: Create the Sloping Floor:
Mix the mortar (consider a mixing paddle for ease) and spread it, ensuring a slope for effective water drainage. You’re aiming for a slight slope, roughly ¼-inch per foot. Let it sit for a day.
Step 6: Add the Waterproof Barrier:
Place a waterproof liner over the mortar, making sure it extends a bit up the walls. This will shield against potential water damage. Secure it around the base drain with a clamping ring.
Step 7: Laying the Final Mortar and Tiles:
Mix another top batch of mortar, connect the linear drain, and check its level. Adjust with drain feet if necessary.
Next, spread the mortar and maintain the gradient. Leave space for thinset and tiles.
After this, you can lay your tiles, ensuring the drain’s top is slightly below the tile level.
Tip: Block drain holes with small stones to prevent mortar blockage.
Step 8: Finish Up:
Once your tiles are in place, use silicone to seal the area where the tile meets the drain. Lastly, snap on the grate, ensuring your floor remains even.
Conclusion
Elevating your bathroom with a linear drain-fitted shower base brings a dash of modern American flair. While it’s a fulfilling DIY project, remember to tread with care. Skipping a step, especially if the drain’s off-center, could backfire. If you’re on the fence, maybe touch base with a pro.
Follow this guide, and you’ll be on your way to a fresh and updated bathroom space!